Showing posts with label Recipes. Show all posts

Tuesday, October 26, 2010

A-ha Moments: Kitchen Edition

I'm back!  Forgive the sporadic posting these weeks, if you will.  I've got one more bout of business travel ahead and then I'm going to settle in for a long and quiet winter, with lots of inspiration up my sleeve and regular posting to do.  In the meantime, I've been cooking up a storm when I'm home, as the grounding counterpoint to the frenetic pace of my work life at the moment.  As a result, I've had a couple of cooking a-ha moments in the last week that I must share...

Firstly, one word: mini-muffins.  We registered for a mini-muffin tin when we got married, and for many years it didn't see a lot of action, and seemed kind of a silly thing to want in retrospect.  I now wholeheartedly take back that notion.  In a house with the following residents: toddler who likes to nosh, mom who doesn't want to commit to a whole muffin, dad who likes just a spot of dessert after dinner (but nothing too huge), mini-muffins are a no-brainer.  I'm now making a weekly batch of mini-muffins, which are thoroughly enjoyed by all.  Lil' J has even taken to standing by the part of the kitchen counter where we've been storing the container of muffins, reaching his arms up with all of his might, and shouting passionately "Muff!!! Muff!!!".  Very gratifying.  My current favorite recipe, with pumpkin on sale for .99 cents a can at Whole Foods, is the classic pumpkin bread in The Joy of Cooking.  The batter only takes about 15 minutes to bake into perfect mini-muffins.
Secondly, three words: yellow corn grits (aka polenta).  I'd forgotten what a cheap, easy staple grits can be.  They act as a base for so many delicious meals, and are even more versatile that risotto in that way, and lot more low maintenance.  Last night we were in desperate need of comfort food, so I roasted a chicken for dinner.  On the side, I made a great batch of polenta that was to die for and so easy, it barely merits a recipe, but here you go:
Monday Night Polenta
Serves 8
Ingredients
2 tablespoons olive oil
1/2 yellow or orange bell pepper, finely diced
1/4 red onion, finely diced
2 tablespoons chopped fresh herbs (rosemary and thyme are especially good choices)
1 cup yellow corn grits (aka polenta)
4 cups veggie or chicken broth
1 cup grated cheese (I used Cabot 50% Light Cheddar, but any cheddar or parmesan would be great)
Directions
1) Heat oil in a a large pot.  Add chopped veggies and fresh herbs and saute for 10 minutes.
2) Add broth and bring to a boil.  Add polenta.
3) Stir with a whisk until the mixture thickens to your liking, about 8 minutes.  Turn off the heat, stir in the cheese, and add salt and pepper to taste. Voila!

I love to eat grits in a creamy pile in a bowl, topped with some protein (like killer roasted chicken and its jus).  But you can also save whatever is leftover in a lightly greased Pyrex dish or pie plate, and cut it into perfect squares or triangles to reheat the next day.  Polenta reheats beautifully in the microwave, or you can get fancy and heat olive oil in a pan and sear the outside of your polenta sqaures, creating a great, crispy crust, then pop them in a low oven until they are heated through.  You can see how this is an all-around winner. 

This morning I was craving more grits, so I popped a nice serving of our leftovers in the microwave and quickly fried an egg to go over the top.  The results were so satiating and nourishing; the perfect start to my day with some strong coffee.  The deliciousness of it all got me thinking of the endless possibilities of grits for breakfast, and I went to the interwebs looking for further inspiration.  The variety of breakfast options I found were diverse and beautiful... check them out!
From The Kitchn: polenta cooked with butternut squash, topped with candied pecans and a dollop of whipped mascarpone.
 From 101 Cookbooks: yellow polenta topped with toasted almonds, dried fruits, and a drizzle of cream and honey.
 From Saveur: Parmesan Polenta with Eggs and Roasted Mushrooms
Expect to see more variations on polenta when this period of travel comes to a close!  
So many possibilities, so little time!

Thursday, September 30, 2010

White Chili

This has so far been a most un-fall-y fall.  Maybe since I've been in Vermont the last six years, I am accustomed to the end of September meaning brilliant foliage colors and chilly nights, often with the first hard frost.  So on this past blustery Sunday, with the boys watching football and the temps hovering in the low 60s, I went and bought the ingredients for what sounded like a quintessential fall dish: white chili.  White chili has no tomatoes or chili powder like traditional chili; it features subtler flavors of green chiles, white beans, and cumin.  I envisioned eating a bowl of this on a crisp night this week, perhaps with rain drops beating on the window outside. However, by the time I got around to making it yesterday, I was wearing shorts and a tank top and, if I am not mistaken, got a bit of a sunburn on my walk to get more cumin from the store!  Where are you fall?  And global warming, what are you doing to chili season???

Okay, trust me, I'm not complaining.  After six years of six month winters, I'll wear my shorts as long as possible, thank you.  I'm just saying, depending where you live in the country (I hear it is something like 120 degrees in SoCal), this dish may or may not appeal this week.  If you are still sweating it out, never fear, this dinner was just as tasty on a warm evening; you just have embrace the southwesterness of it all. And if you are a chili lover, I definitely recommend giving this recipe a whirl, no matter what your thermometer reads today.  We loved it.  Subtly spicy and with a jalapeno kick, it was really quite delicious, and a nice departure from the classic ground beef chilis everyone is in the mood to whip up this time of year.  Well, not everyone. Vegetarian friends, I think this recipe could be just as good without the chicken...try it and let me know!
White Chili
Ingredients
1 lb. large white beans, soaked overnight
2 tablespoons olive oil
1 large yellow onion, chopped
2 cloves garlic, minced
1 jalepeno pepper, minced
8 cups chicken broth
2 chicken breasts
2 4 oz. cans chopped green chiles
2 teaspoons ground cumin
1 teaspoon paprika
1/2 teaspoon oregano
1/4 teaspoon cayenne pepper
2 teaspoons salt
1 tablespoon brown sugar
1/2 cup half-and-half
Chopped cilantro, grated sharp cheddar and sour cream for garnish
Directions
1) Soak your beans overnight.  When ready to use, rinse them thoroughly.
2) Heat the oil in a heavy soup pot or Dutch oven.  Add the onions, garlic and jalapeno and saute until the onion softens and begins to turn brown, about 10 minutes.
3) Add the beans and broth, bring to a boil and then turn down to a low simmer and allow to cook, covered, for about 2 hours or until the beans are very soft.
4) Bring a small saucepan of water to a boil.  Add the chicken breasts and allow to them to poach in the boiling water until they are cooked through: about 15 minutes. Remove from water and allow to cool on a plate in the fridge while the beans cook.  When the chicken is cool to the touch, shred it by hand.
5) When the beans are cooked through, stir in the chicken, chiles, spices and sugar and allow the flavors to combine.  Taste and adjust seasonings as necessary.
6) Lower the heat and stir in the half-and-half.
7) Serve with cilantro, cheddar and sour cream.
Serves 8
Some notes about this recipe:
- This chili, as prepared above, has quite a kick to it.  If you are serving a crowd whose palettes can't take heat, omit the jalapeno.
- "Brown sugar, SMJ? Really? In chili?", you say.  Yes, I say.  I tasted my chili after adding the spices and it was just missing something... it was tasty but had kind of a one-note chile flavor.  Adding the sugar balances the spiciness of the peppers and gives the whole dish a lovely, rich complexity.  Just trust me on this one.
- You could totally leave out the half-and-half; it adds a delicious creaminess, but the chili was pretty damn good without it as well.  I just couldn't leave well enough alone.  And I like creaminess.
Enjoy!

Wednesday, September 8, 2010

Slow-Roasted Summer Tomatoes

Tomatoes seem to be falling from the skies these days and gardeners, as well as farmers' market junkies, are enjoying luscious piles of red, orange, yellow and green juicy goodness.  I can't help myself when I see ripe, just-picked tomatoes at the market, and I always tend to over buy.  This recipe is a great way to ensure that not-a-one precious little globe will go to waste.

Okay, so this is less a recipe and more a philosophy, the philosophy being: when you have produce at the height of its season, the best thing you can do to it is simply not much... add a little fat, a little salt and pepper, and let it just revel in all of its harvest glory.  In fact, when I went to write the recipe, it was going to call for 3 pints of cherry tomatoes, but then I used half of one of my pints in my lunch salad and you know what?  The recipe will still be delicious.  So I am going to not even write this like a recipe and instead just tell you this:
  • Pre-heat your oven to 300F 
  • Rinse your tomatoes
  • Toss them in good olive oil, kosher salt and freshly ground pepper
  • Put them on a baking sheet and in the oven for an hour, tossing periodically and adding more oil if they look dry
When they come out, they'll be falling apart, slightly caramelized and ridiculously delicious.  Cook your favorite shape of pasta (mine is cappellini, the husband's is rigatoni... both work well with this sauce), drain it saving a bit of the cooking liquid, and scrape the entirety of your baking sheet of tomato gold into the pot, adding the pasta-water bit by bit for extra moisture, if needed at all.  Garnish the whole thing with freshly chopped basil and shredded parmesan and enjoy on the spot.  You could also add some sauteed sweet Italian sausage to the mix if you have a hungry Italian guy to feed, or save some out to spoon onto crostini for a quick bruschetta.  Honestly, it is hard to go wrong with Slow-Roasted Tomatoes.  If you must, you can even just sit and eat them with a spoon.
Mangia!

Tuesday, August 31, 2010

Sublimely Silent Breakfast

Q: What do you do when it is 10am, you still haven't eating breakfast, you've run 4 miles and need some restorative calories, and you are about to get on a conference call and don't want to be slurping and chomping into the phone?
A: You whip up a silently sip-able and delicious breakfast in the form of a smoothie.  Mine is protein and potassium packed, making it a great recovery drink, and I split it with little J, who got kind of hot on the run himself.  He sucked it down and asked for more, so this was a win-win all around.
SMJ and Little J's Favorite Smoothie
Ingredients
6 ice cubes
1/2 banana
1/2 cup Greek yogurt
1/2 cup calcium-fortified vanilla soy milk
1 teaspoon honey
1 heaping tablespoon almond butter
small handful blueberries
Directions
Throw all ingredients in blender.  Blend until combined.
Serves 1.5

*Please note: I had no time for photos this morning... I was truly on the fly.  So I found the beautiful photo above on All Recipes, where it illustrates a recipe for a Banana-Peach Buttermilk Smoothie which looks divine... try both recipes while the weather is still toasty!

Monday, August 30, 2010

Dip-o-licious

Mine is a household that takes appetizers seriously.  As we've discussed before, the husband is a sucker for chips and salsa, and I would be happy to have cheese and crackers for dinner any day of the week. In fact, dinner of appetizers is one of my favorite dinners, hands down.  However, our cheese spreads have been getting old, and aren't the healthiest option, and the brutal heat is back, meaning lighter and more refreshing fare was in order to accompany our Sunday evening barbecue sesh.  I thought a bounty of fresh veggies would be just the thing, but lest we be too virtuous, they'd need a dip to make them special. When I am in the mood for perfection, I always turn to Ina, who never lets me down.  


The Pan-Fried Onion Dip in the original Barefoot Contessa Cookbook is a play on the French onion dip we all grew up eating (packet of French onion soup + container of sour cream = 80s party staple), but this version of that classic is so much more complex and flavorful than the original.  Why?  Because instead of using dried, sodium-crusted onions, you caramelize fresh onions into ooey, gooey perfection, and blend them with a melange of creamy items until the whole thing is ridiculously smooth and dreamy.  Honestly, how can you even compare this:
To this:
You can't. 
There's nothing like keeping it fresh.  Try this while all the harvest veggies are at their finest.  YUM.
The Barefoot Contessa's Pan-Fried Onion Dip
Ingredients
2 large yellow onions
4 tablespoons unsalted butter
1/4 cup vegetable oil
1/4 teaspoon ground cayenne pepper
1 teaspoon kosher salt
1/2 teaspoon freshly ground black pepper
4 ounces cream cheese, at room temperature
1/2 cup sour cream
1/2 cup good mayonnaise

Directions
1) Cut the onions in half and then slice them into 1/8-inch thick half-rounds. (You will have about 3 cups of onions.) 
2) Heat the butter and oil in a large saute pan over medium heat. Add the onions, cayenne, salt, and pepper and saute for 10 minutes. Reduce the heat to medium-low and cook, stirring occasionally, for 20 more minutes until the onions are browned and caramelized. Allow the onions to cool.
3) Place the cream cheese, sour cream and mayonnaise in the bowl of an electric mixer fitted with the paddle attachment and beat until smooth. Add the onions and mix well. Taste for seasonings. Serve at room temperature.

Monday, August 23, 2010

Easy Going Quinoa Salad

I've sung the praises of quinoa here before, but let's recap: an ancient grain, quinoa is a complete protein unto itself, and it has a nutty, toothsome crunch that is oh-so-satisfying.  It cooks in 15-minutes, and is a perfect base for any number of whole-lunch salads.  My last quinoa creation was Heidi Swanson's Double Broccoli Quinoa , which was delicious and nutrient-rich to be sure, but a little garlic-heavy for certain customers.  Not only is my recipe way less labor-intense than that one, it is also way less garlic-intense, so hopefully the husband enjoys it too.  It is so not intense in anyway, I have named it...
Easy Going Quinoa Salad
Ingredients
1 cup quinoa, rinsed
1 cup water
1 teaspoon salt
3/4 cup silvered almonds
1/2 cup dried cranberries
2 crowns broccoli, chopped
1/4 cup apple cider vinegar
1/4 cup olive oil
1 heaping teaspoon Dijon mustard
1 teaspoon honey
1/2 cup feta, crumbled
salt and pepper to taste 
Directions
1) Bring water to a boil in a small saucepan.  Add quinoa and salt.  Bring down to simmer and cover.  Cook for 15 minutes or until all water is absorbed, and the quinoa has fluffed-up and started to uncurl.
2) Heat a dry frying pan on high-heat.  Add the almonds.  Toast them for several minutes until brown and fragrant (DO NOT walk away during this time -- toasted can turn to burnt very quickly -- but just keep tossing them and they'll toast beautifully).
3) Add the almonds and cranberries to a large bowl.
4) In the same frying pan, cover the bottom with water.  Add the chopped broccoli florets and cover, steaming them for just a few minutes until they are bright green.  By this time your quinoa should be cooked.  Drain the broccoli and add it and the quinoa to the bowl with the nuts and berries.
5) Mix the vinegar, oil, mustard and honey together in a small bowl to create a dressing.  Add the feta and dressing to the salad and toss well.
6) Season with salt and pepper to taste.  Can be served warm immediately, or will keep well for several days.  Serve a scoop over a bed of greens or spinach for a powerhouse lunch!
So easy, you'll have time to take a nap.

Friday, August 6, 2010

Daily Candy, Kiddie Sushi

Have you guys heard of Daily Candy?  It's a fun daily e-mail service offering "a handpicked selection of all that's fun, fashionable, food related, and culturally stimulating in the city you’re fixated on (and all over the Web)", and I love it. While most of the shopping-related insights are a bit high-end for my current lifestyle, they are still fun to peruse in the same way you love to flip through Vogue with the full knowledge you'll never be buying or wearing that Versace dress.  What I am really loving from the DC these days are their Daily Candy Kids updates, which feature all kinds of ideas for products, projects and and general creative coolness for kids... think everything from sippy cup reviews to nursery decor ideas.  This week there was a post I particularly loved... Ice Cube Tray Sushi from a new cookbook called "Time for Dinner", written by three former Cookie Magazine editors (Oh, Cookie, how I miss you!).  I'd love to get my hands on this book, as I'm having the darndest time trying to get little J to branch out beyond hummus, pb&j and turkey meatballs these days.  I really want him to enjoy food the way his dad and I do, and I am thinking adding some novelty into the mix could be the way to go.  Plus, if these are a dud, I would happily scarf them all down myself with a nice, chilled glass of Vinho Verde.
Ice Cube Tray Sushi 
Ingredients
7 oz. sashimi-grade salmon, cut into ¼-inch cubes (cooked shrimp or vegetables work well, too)
3 scallions, chopped
3 tbsp. cucumber, finely chopped
3 tbsp. (approximately 5) grape tomatoes, finely chopped
2 tsp. lime juice
1 tsp. orange juice
2½ tbsp. mayonnaise
¼ tsp. sesame oil
¼ tsp. salt
1/8 tsp. pepper
2 c. cooked rice
Directions
1. Combine all ingredients except the rice in a bowl.
2. To make the sushi-rice blocks, use an ice cube tray as a mold. Prepare the mold by sprinkling it lightly with water.
3. Press the rice into the tray squares; use your finger to push a hole three-quarters of the way into each square.
4. Turn the mold upside down onto waxed paper and tap until the squares fall out.
5. Fill each hole with 2 tsp. of the salmon, shrimp, or vegetable mixture and serve.
Serves four

I am going to be somewhat on the fly for the next week on a multi-stop road trip ending at wedding next Saturday where the husband will be looking dashing in a tux as a groomsmen.  During this time, I will most certainly not be making Ice Cube Tray Sushi.  So, I put this post up partly as a bookmark, partly as a weekend inspiration for the rest of you.  If anyone, especially anyone with picky-eatin' little ones, happens to chef this up over the weekend, will you kindly let me know how it goes?  Thank you, and happy Friday!

Monday, July 12, 2010

Celebration Cake

So much to celebrate... after a Herculean unpacking effort over the weekend, our new apartment finally feels like home.  I love our new neighborhood so much.  Baby J is officially walking.  The heat wave has broken with a glorious summer thunderstorm (love those).  My sister is here!  And life is good.  What better way to celebrate than with cake?   Would you like the hands-down best cake recipe in the world?  Yes?  Well, here you go:
Photo by cake goddess and wine-making genius Haley
Celebration Cake
Ingredients
2 cups sugar
4 eggs
1 cup vegetable oil
1 cup dry white wine (never use anything you wouldn't drink!)
2.5 cups all-purpose flour
1/2 teaspoon salt
2 1/4 teaspoons baking powder
1 teaspoon vanilla
Directions
1) Pre-heat the oven to 350F. Grease and flour 9-inch round pans.
2) Beat the sugar and eggs together with an electric mixer.  Add oil, wine, flour, salt, baking powder and vanilla and beat.
3) Bake for 30 minutes, until a toothpick inserted in the center of each cake comes out clean.
And the best part, the Icing
Ingredients
3 cups semi-sweet chocolate morsels
2 sticks unsalted butter
2 teaspoons vanilla
2 cups powdered sugar
Directions
1) Melt butter and chocolate together over very low heat, or in a double boiler.
2) Remove from heat, add vanilla.
3) Add sugar, beating gradually until combined.
Allow the cakes to cool completely before removing from their pans and icing them in layers.  I say without compunction that this cake is THE BEST.  It is adapted from the Great Yellow Cake recipe in the Silver Palate New Basics cookbook, that 80s classic which is full of gems from all of our childhoods.  This cake is the best thing to come from all three of their volumes as far as I am concerned.  How often do you find a winning cake recipe that doesn't involve a lick of sifting, obscure ingredients, or undue fuss?  This celebration cake is an all-time crowd-pleaser, delighting even those people who claim to only like pie (I don't believe you).  Try it and let me know what you think... you won't be disappointed!
Cheers!

Tuesday, June 22, 2010

Soul Food... SMJ style

As I mentioned last month, this summer I'm going to be helping my friend Laura, from Black Kettle Farm here in Maine, create recipes for her CSA members.  We're hoping to give them, and you, innovative ideas about what to do with your seasonal produce.  This week, Laura's CSA members will get garlic scapes and collard greens in their baskets, and these happen to be two favorite ingredients of mine.  Even though we're yankees (and Red Sox fans!) through and through, the hub and I love ourselves a little Southern cookin', and garlic scapes and collards lend themselves to one spectacular Southern-inspired meal.
 
Creole Sautéed Shrimp with Garlic Scapes, Melted Collard Greens, and Baked Beans
So, let's break this meal down, shall we?  First off, the baked beans.  You can make 'em from scratch if you please, and fab recipes for doing so abound across the interwebs (see inspiration here and here).  If you don't have the time or the will to make scratch beans, we adore Heinz Vegetarian Baked Beans, and the ones above were purchased at our local butcher, who sells yummy side dishes like this along with great, organic meat. 
Also, you may be asking yourself, "SMJ, what is a garlic scape, anyway?". 
Garlic scapes are the curly tipped, delicious green shoots that grow from heads of garlic, which are usually discarded before harvesting in most of the U.S.  If they are harvested while they are still tender, they can be used in a variety of recipes, and have a delicate, unusual flavor that is a cross between a green onion and garlic.  These are so worth a try and so pretty to have around the kitchen.  They are also the foundation of my Creole Shrimp recipe.
Creole Sautéed Shrimp with Garlic Scapes
Serves 4
Ingredients
1 cup all-purpose flour
1 tsp. kosher salt
1/2 tsp. each fresh ground pepper, paprika, onion powder, oregano and thyme
1/4 tsp. cayenne powder
2 pounds medium shrimp
5 long garlic scapes, thinly sliced
1 teaspoon butter
Olive oil
1 lemon
Directions
1) Peel, de-vein, and rinse shrimp. Dry off excess water.
2) Put the flour in a medium bowl and mix in all the spices.  Add the dry shrimp to the bowl and toss to coat with the spice-and-flour mixture.  Set aside.
3) Put the butter in a large pan. Coat pan with olive oil . Heat the pan over medium heat. Add the scapes and sauté until they begin to wilt, about 5 minutes.
5) Turn the heat to high and add the shrimp, using a slotted spoon to transfer the shrimp to the pan and shaking off extra flour en route. Sauté until just done, probably about 5 to 7 minutes.
6) Transfer shrimp to plates, and squeeze fresh lemon juice over the top.
And for a nice veg...
Melted Collard Greens
Ingredients
1 bunch collard greens
1/2 cup water
2 tablespoons olive oil
1 tablespoon honey
paprika, salt and fresh ground pepper to taste
Directions
1) Chop the collards into ribbons.
2) In a deep skillet with a lid, bring the water to boil.  Add the greens, cover, and allow to steam for about 5 minutes, until well wilted.  Drain in a colander, pressing out extra moisture.
3) In the same skillet, heat the oil over medium heat.  Add the collards and honey and sauté until collards are soft, but still retain some bite, about 5 more minutes.  Season to taste.

This may not be a classic Southern meal... for one thing, it contains no pork fat, and for another, I am not sure garlic scapes are technically a soul food staple, however, this is a healthy and unique spin on the flavors of the region we adore, and a great way to use some of your fresh produce this week.  Enjoy!

Friday, June 18, 2010

Celebration Steak

Last week, my very own mama won the prestigious Teacher of the Year award at her school (woo hoo!).  We all decided that this called for a celebratory dinner, and the guest of honor was craving steak.  Wanting to mix it up a bit from our usual summer grill fare, I recalled a recipe from a New York Times article on Italian grilling that I read years and years ago.  I searched for this recipe online, but couldn't find it, and so we just winged it and the results were BEYOND.  I know that this recipe sounds very simple and also will make you want to say what the husband did:  "You're going to rub those steaks with olive oil?  WHOA."   Yes, you are really going to rub those steaks with olive oil, and yes, you are going to want to hug me after you do.
Florentine-style Grilled Steaks
Serves 6
Ingredients
2 garlic cloves, crushed and halved
3 T-bone steaks (each about 1.5 pounds), at room temperature
2 tablespoons good olive oil
Kosher salt and freshly ground black pepper
1 lemon
1 bag arugula
Directions
1) Rub the garlic cloves over the steaks, then rub them with olive oil.  Go ahead, do it.  It feels so wrong, but it is so very right.
2) Season the steaks liberally with salt and pepper (so liberally that again the husband said WHOA.  I reminded him to please trust me.  He said he was glad he did.).
3) Light your grill. Grill the steaks over medium-hot coals or flame until cooked to desired doneness, turning once.
4) Now, here's the hard but important part, you must let the steaks rest for at least 10 minutes before slicing.  This allows the meat to retain all of its juices and become the most tender, juicy loveliness you have ever had.
5) Slice the meat against the grain into 1-inch slices. Squeeze the lemon over the steaks. Serve on a bed of arugula.

We served this steak with just a simple caprese salad: gorgeous cherry tomatoes and fresh mozzarella cut in quarters, showered with chopped fresh basil, and dressed simply with olive oil, balsamic vinegar, salt and pepper.
Italians know how to live.
So glad I married one.

Wednesday, June 16, 2010

Summer Soup

So, June isn't exactly prime soup time, but I'll tell you what: we're still getting some cold, rainy evenings up here in the north, and I am willing to bet that some of my southern readers are dining in air conditioning these days, so perhaps soup isn't such a bad idea.  There are few better ways to make use of an abundance of vegetables and my friend Laura, from Black Kettle Farm, just brought me two huge, gorgeous bunches of chard which were crying out to be soup-ified.
Also, my dad is just getting back from a long trip overseas, and white bean and veggie soup is his favorite.  As we know, I aim to please, so I whipped up this soup yesterday in anticipation of his homecoming.  I was just going to quietly keep it off the radar, thinking none of you would want a soup recipe this time of year, until my mom proclaimed it "the best soup she has ever had."  This from a woman who pretty much survives on soup alone between the months of October and April. So, in honor of such a distinction, and in case you are being pelted by rain or shivering next to your AC, here is a great summer soup to make use of some of your farmers market goodies.
SMJ'S Sweet Summer Soup
Ingredients
Olive oil
1 lb. dried cannelini beans, soaked overnight
2 sweet Vidalia onions, coarsely chopped
4 garlic cloves, minced
2 carrots, peeled and diced
1 roasted red pepper, chopped
2 tablespoons fresh thyme, chopped
1 cup sun-dried tomatoes, chopped
6 cups veggie or chicken stock
2 bunches Swiss chard, coarsely chopped
1 cup fresh basil, chopped
Salt and pepper to taste
Directions
1) Soak your white beans overnight before starting this recipe.  Drain and rinse them well.
2) Cover the bottom of a soup pot with olive oil and heat it on medium-heat.  Add the onions and saute for 10 minutes until translucent, then add the garlic, roasted red pepper and carrots and saute until the carrots are just tender, about 10 more minutes.
3) Add the soaked white beans, the sun-dried tomatoes and thyme and stir well.
4) Add the stock.  Bring to a boil, then lower to a simmer and cover.  Allow the soup to simmer until the beans are well-cooked and soft, about 2 hours.
5) Stir in the chopped chard and basil.  Both will wilt into the soup in about 5 to 10 minutes.  Season with salt and pepper to taste.
The skies are darkening and the temperature is dropping as I write this... perfect night for a bowl of soup and a glass of white.  Ahhh, summer.

Wednesday, June 9, 2010

Carrot Salad with Harissa, Feta and Mint

You may have noticed by now that I am something of a food blog junkie.  I can't help myself... I love to cook, I love to eat, and I love to read about cooking and eating and look at gorgeous photos of gorgeous food... this is my passion!  And every once and awhile, a recipe seems to take the food blog world by storm: one person makes something and raves about it, her commenters make it and go wild for it, and slowly but surely, it makes its way through the blogosphere, gaining popularity like a giant culinary snowball.  So it was with this Carrot Salad with Harissa, Feta and Mint.
I saw this beauty first on Smitten Kitchen and then on Wednesday Chef and then I knew I could no longer resist its charms.  The salad did not disappoint.  We all agreed it was like nothing we had ever tasted before, and that was probably due to the harrissa.  Harissa is a North African chile paste made from hot chiles, garlic, cumin, corriander, caraway and olive oil.  It is supposedly delicious on everything from eggs to potatoes to veggies to bread... basically anywhere you would smear some mustard, you could smear some harissa instead.  So far, I've only tried it in this salad, but the flavor was gorgeous and complex; a bit floral, a bit herbal, and with a nice but tolerable kick of heat.  Buying jarred harissa would make this recipe a total snap, but we couldn't find any here in our corner of northern New England, so we made our own, using this recipe. I'll be honest, it was a bit much.  Worth the work in the end, but just not what I signed on for when I found this recipe, you know?  The upside is that we now have a tall jar of the stuff, and will be able to use it at will for some time to come.

In any case, the salad is really something special.  The fresh, green tang of mint and parsley against the acid of the lemon and the subtle heat of the harissa create the most unique flavor sensation, and the feta takes it over the top.  This is a perfect side dish for lamb, or to serve as lunch with some great bread.  Especially if you can find a jar of harissa in your local gourmet shop, I recommend giving this recipe a try and seeing what all the hype is about.
Carrot Salad with Harissa, Feta and Mint
Adapted a bit from a Smitten Kitchen reader, who adapted it from her mother, who adapted from Cuisine Magazine
3/4 pound carrots, peeled, trimmed and coarsely grated
4 tablespoons olive oil
1 crushed clove of garlic
1/2 teaspoon caraway seeds or about half as much, ground
3/4 teaspoon cumin seeds or about half as much, ground
1/2 teaspoon paprika
3/4 teaspoon harissa
1/2 teaspoon sugar
3 tablespoons lemon juice
2 tablespoons flat leaf parsley, finely chopped
2 tablespoons fresh mint, finely chopped
1/4 lb. feta, crumbled or chopped into bits
In a small sauté pan, cook the garlic, caraway, cumin, paprika, harissa and sugar in the oil until fragrant, about one to two minutes. Remove from heat and add the lemon juice and a pinch of salt. Pour over the carrots and mix. Add the herbs and mix. Leave to infuse for an hour and add the feta before eating.

One final note... check out Smitten Kitchen's photograph of the same salad:
This tells me that:
a) I need better knife skills.
b) I need a better camera.  SUCH photo/camera envy!  Drool. Drool. Drool.
P.S. -
Drool.

Tuesday, June 1, 2010

Back with a Grill Fest

I'm baaaaack after a unintended but much-needed brief blogging hiatus.  Sometimes a girl just has to unplug for a few, you know?  However, now I am coming back at you refreshed and full ideas to share this fine June, so expect a lot of posts here soon, many of which will most certainly center around one of my favorite things about summer: the grill.  It is no mistake that I married a man who owns three grills; we share a love of cooking over an open flame that will keep us together forever.  We really did it up this Memorial Day weekend, and I'm excited to share some of the goodies.  My inspiration came from my favorite magazine of the whole year: Food and Wine's June Grilling Issue.  Every year I swoon over the photos and new ideas, and I can't wait to try them out as soon as the weather permits.  This weekend we had two real winners from the June 2010 issue: Grilled Tomato Crostini and  Pasta Salad with Grilled Sausages and Peppers.  Swoon, swoon, swoon.  First the crostini...
So simple, so easy and so elegant; I'll definitely be making this many times that the grill is lit this summer.  You simply make a tinfoil pack, and fill it with mounds of fresh tomatoes (chopped heirlooms, whole grape and cherry tomatoes... basically, whatever looks good at the store).  You season the whole thing generously with kosher salt and pepper, add a large glug of olive oil, and throw it on the grill for about 20 minutes.  In the meantime, you slice a baguette or ciabiatta and grill the slices until they are nicely toasted.  You cut a garlic clove in half, rub it into the toasts, top them with the grilled tomatoes, and shower the whole thing in freshly chopped basil to finish.  This is one of those "Duh" recipes... tomatoes and basil on crostini are not exactly culinary wizardry.  However, there is something about the sweet, smoky, juicy flavor of the grilled tomatoes that really takes this recipe over the top.  We made a ridiculous amount and they all disappeared.  On to the pasta...
YUM.
I've linked to the real recipe from Food and Wine above, but mine was a slight variation.  I left out the smoked mozzarella because more than half the people around the table were lactose intolerant, and I respect that.  We all agreed that the cheese wasn't missing at all.  I also left out the celery because I despise celery with a passion, and that is just how it is.  Finally, I just worked with the sausages I could find: 3 hot and 3 sweet Italian ones that my friend Molly happened to have on hand, and what looked good at the butcher, which was not "weisswurst" and breakfast sausage, which the recipe called for, but Niman Ranch Andouille Sausage and Al Fresco Roasted Pepper and Asiago Chicken Sausages (yes, I realize Asiago=cheese, I thought maybe just a dash of it would be okay for my lactose-averse peeps...it seemed to work out well).  This is a really special recipe which requires a ton of grilling (thanks, husband!).
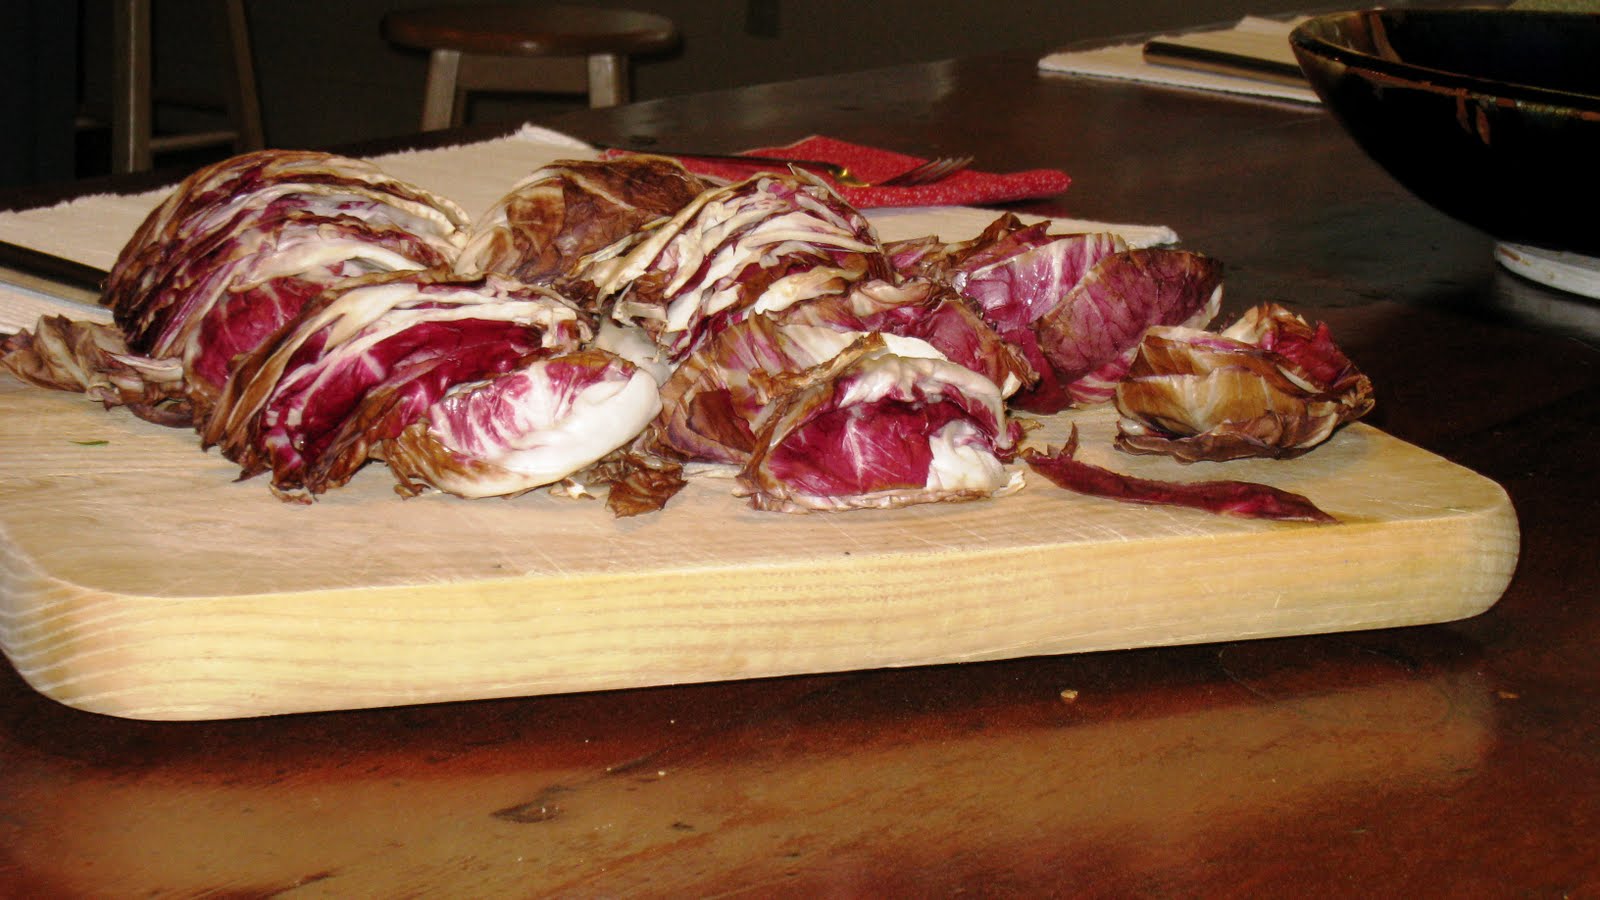
We grilled peppers, sausages and radicchio and chopped them all.  That is also a little peach you see on the grill, just because.  We ate some on the side, and fed some to the baby.  Thumbs up all around.   The grill really turned the radicchio into a caramelized, bittersweet, beautiful treat.
You toss all of this loveliness with a dressing made of fresh lemon juice, lemon zest, fresh basil and thyme, garlic and shallots.  It is really the best of summer in a bite and so different than the usual fare you see coming off of your backyard grill.  With a nice glass of Erik the Red table wine from Toad Hollow this was a fabulous early summer meal.
Thanks to our own "Good Golly" for aforementioned bottle of red and for food photography assistance!

Tuesday, May 18, 2010

Spring Veggie Extravaganza

We're obviously without-garden this year, but many of my dear friends are either avid gardeners or badass farmers and on the hunt for new and exciting things to do with their boatloads of veggies this spring.  So, today I have three simple and wonderful ideas for three seasonal favorites: artichokes, asparagus and arugula.  Even if you don't have these veggies sprouting up outside your door, they may be what are freshest and most tasty at your market right now, so give these a try!
 
We looooove artichokes, and with a bit of prep work, they're a snap to make.  Elise at Simply Recipes does a perfect job of explaining, step by step, how to properly trim and cook an artichoke.  My suggestion is for a fabulous dipping sauce, and all credit must be given to my equally fabulous friend Brian for this one; every recipe I've ever stolen from him is to die for. To make Brian's famed dipping sauce (enough for about 4 artichokes), mix 2 finely-minced garlic cloves with a half-cup of mayonnaise and about 3 tablespoons of red wine.  Add a bit of salt and pepper and adjust the wine and seasonings to taste.  The resulting sauce is a gorgeous purple color thanks to the wine, and has just the right amount of bite from the raw garlic (just don't plan on doing any smoochin' after this dinner).  This takes minutes to whip up, but tastes gourmet, and makes a stunning presentation with the violet-hued sauce next to the bright green steamed 'chokes.  An instant classic. Love ya, Bri.
The best thing to do with seasonal vegetables is to just not mess with them too much.  They are bursting with so much fresh, pure flavor, why not let that shine through?  This is the case with our grilled asparagus. When you have the grill lit for dinner, throw on asparagus make a delicious and easy side dish.  Trim the ends, and toss the stalks with olive oil, salt, pepper, and a hint of garlic powder.  Cook them for about 5 minutes on the grill, turning often to prevent burning.  Finish them with a generous squeeze of fresh lemon juice when they come off the grill.  We've been eating these at least twice a week, and no one is tired of them yet!
Finally, arugula. As I've mentioned before, our local pizza joint makes the most incredible prosciutto, balsamic fig jam, Great Hill Blue Cheese and fresh arugula pizza, but if that sounds too fussy for your weeknight, why not try a pared down version?  Buy a pizza dough.  Pre-heat your oven to 450.  Roll out your dough, brush it with olive oil, layer on your favorite cheese (a soft gouda could be particularly dreamy) and bake for 5 minutes.  Meanwhile, toss the arugula with olive oil, salt and pepper.  Add it to the top and bake for another 10 minutes.  For extra points, you could add chopped prosciutto and/or chopped fresh tomatoes or carmelized onions when you add the arugula.  Pop open a bottle of red, and enjoy.
What's your favorite spring recipe?

Thursday, May 13, 2010

Spice-rubbed Cedar Plank-Grilled Wild Salmon

We had the most beautiful Mother's Day dinner on Sunday, and this salmon was the centerpiece.  The recipe couldn't be easier, and this will be a great go-to grill recipe for the summer.
Ingredients (recipe serves 5)
2.5 lb wild Alaskan salmon filet
Cedar plank (find these at gourmet shops or wherever grilling toys are sold)
Two tablespoons brown sugar
Two tablespoons kosher salt
2 teaspoons fresh ground pepper
2 teaspoons paprika
2 teaspoons fresh thyme, finely chopped
Directions
*Amended to add: the cedar plank needs to be soaked for at least an hour ahead of time.  Major oversight!  Thanks for the catch, "Stedman".*
1) Light your grill.
2) Rinse and pat dry the salmon filet.  Place on cedar plank.
3) Combine spices well in a small bowl.  Cover filet evenly and thoroughly with the spice rub.
4) Place cedar plank on grill rack and cover the grill. Remove the lid and check periodically for flare-ups and doneness.  The fish should cook through in about 12 to 15 minutes.
This is a dish that is really simple, but really special.  The smoke created by the burning wood gives an incredible depth of flavor to the fish and the brown sugar in the rub provides a sweet counterpoint to this smokiness.  Packed with Omegas and healthy protein, this is a perfect dish to kick of my series of health related posts as well!  We threw asparagus tossed with olive oil, salt and pepper on the grill after the salmon came off and the coals were a bit cooler, and roasted tiny new Yukon Gold potatoes to serve with low-fat sour cream, freshly snipped chives and salt and pepper.  This was a well-balanced and delicious holiday meal... give it a try!

Tuesday, April 20, 2010

Slow-Roasted Tomato Sauce + Beans and Greens

After a weekend of cupcakes and wine, and it is time for some clean eating.  As a Libra, I'm always searching for balance, and so after a weekend of total indulgence, I like to reign things back in once the week begins.  This week, I'm keeping things vegetarian, and focusing on whole grains and fresh vegetables. One of my favorite easy weeknight dinners is whole wheat pasta with slow-roasted tomato sauce.  The flavors are gorgeous, and the recipe couldn't be easier.  We've been getting incredible local cherry tomatoes, so I simply rinse about a pound of them and put them in a baking dish, throw in 6 whole cloves of garlic (okay, 7.  okay, 8... but if you can't roll with garlic like my family, keep it to a half-dozen cloves or less), drizzle the whole thing with olive oil, sprinkle it with kosher salt and fresh ground pepper, and toss it in a 350 degree oven for about 90 minutes, or until the tomatoes are bubbling and oozing.  In the meantime, I boil a pot of salted water and cook a pound of whole wheat pasta (I'm really digging angel hair at the moment, but spaghetti, orchiette or penne would be lovely as well).  You can really just toss the tomatoes with the pasta, generously douse the whole thing in parmesan cheese and call it dinner.  However, to really take it to the next level, I've been doing two things: adding about a cup of chopped fresh basil, and buying this amazing marinated mozzarella salad at our local Italian specialty shop, chopping up all the little bocconcini and other little goodies in there (which appear to be marinated red onions and some fresh herbs) and tossing that in as well, along with the oil that salad has been marinating in.  This little bit of fat adds calcium and keeps things from getting too virtuous.
I'm also craving dark green veggies, but not so much in a salad way, so tonight I did a little variation on our usual beans and greens to go along side the pasta.  I bought beautiful rainbow chard and chopped it into ribbons.  Then I chopped a whole mess of, you guessed it, garlic (3 cloves?  okay, 4.) and sauteed that in some olive oil. I added a drained can of chickpeas and sauteed them over high heat until they started to get crispy, then added the chard and tossed it until it was wilted.  I finished the dish with salt, fresh ground pepper, and the freshly squeezed juice of one lemon. This would also benefit from a healthy sprinkling of roasted red pepper flakes, but one of my customers this evening has a tender palette and prefers things not so spicy, so I left it simple... but if you are cooking for a house of iron tongues, go for it. 
We've got protein, we've got fiber, we've got vitamins galore, whole grains, and healthy fats.  I feel redeemed already.  And they say red wine has health benefits as well...

Thursday, April 15, 2010

Bite of Brasil

My favorite things to bring home from travels abroad are recipes.  Long after you've lost an earring from the pair you picked up in that flea market or worn a hole through that t-shirt advertising the local beer, you can still whip up a bowl of Tom Kha soup or sprinkle some za'atar on a pita, and be taken right back into that memory of an amazing adventure.  One of the best trips I've taken was during the first year the husband and I were dating, with my family, to Florianopolis, Brasil.  So many things made this trip a dream: my future husband doing some priceless bonding with my family, the incredible graciousness of the family friends who hosted us and fed us like kings night after night, the beachside location, and that special sparkle in the people that is just inherently Brasil... it's magic.
 
The husband in particular paid close attention to every meal we were served and has mastered some of our favorite Brasilian recipes completely.  One of the best dishes that he makes from this trip is a special seafood stew called Muqueca.  In the photo above, our Brasilian hosts took us on a day trip to Lagoa da Conceição.  We took a boat across the water and went to a restaurant whose specialty was this delicious dish.  We were totally enchanted by the sweet, savory, coconut-y deliciousness of Muqueca, and knew we had to recreate it at home. Through a combination of flavor memories and internet research, we've come up with a version that brings us right back to this day.
Muqueca
Ingredients
1/2 cup olive oil
1 sweet onion, chopped
1 red pepper, chopped
1 green pepper, chopped
4 plum tomatoes, chopped
1 can light coconut milk
2 lbs. firm white fish (halibut, cod, swordfish or tilapia all work well)
Freshly squeezed juice of 1 lemon 
1 tsp. each paprika and red pepper flakes
Pinch of salt and pepper
Directions
1) Pre-heat the oven to 400 degrees F.
2) Heat olive oil in a deep skilletAdd the onions and peppers and saute for 10 minutes, until soft.
 
3) Add the chopped tomatoes, coconut milk, lemon juice and spices and mix well.
 
4) Place the fish, skin side up, on top of the sauce and sprinkle with paprika. Cover the skillet, place in the oven and bake for 30 minutes.
 
5) Remove the skillet from the oven and the skin from the fish.  Break the fish into pieces for serving.  Serve over rice.
 
Recipe serves 4, with leftovers 
 
 Any recipe that brings back a day out on the ocean with my dad is a keeper in my book.